

Like we discussed earlier in previous Paper airplane tutorials – Aircraft will experience four main forces are called LIFT, WEIGHT, THRUST, and DRAG. So when you throw a paper plane, your throw provides the Lift and the air which is trying to stop is Drag, The mass of the Paper airplane is called Weight (Gravity) and the Wings that provides an upward force which is called Lift. This aloft craft provides a very good amount of lift because of their wing design constantly on every throw. Learn how to make levitator Paper plane from LND. It’s just one scroll away!
Two minutes for Noodles! isn’t it? Three minutes for Paper planes! It’s that simple with liftndrift*
Supplies Required:
- A4 Sheet of Paper or a Foolscap Paper with 70-90 GSM
- Ruler or Flat thick object to flatten the folded edges to make a strong crease.
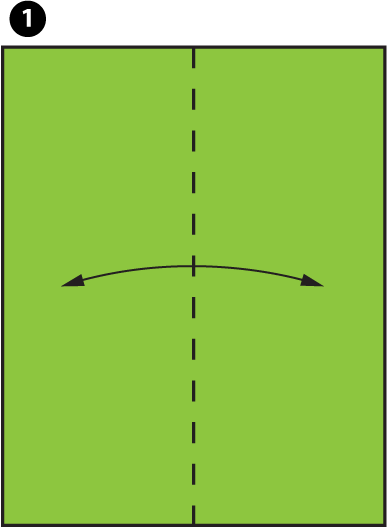
Step 1:
- Keep the A4 sheet of paper in Portrait orientation and fold them from Left to Right equally as shown in Fig.1
- UNFOLD them once done.
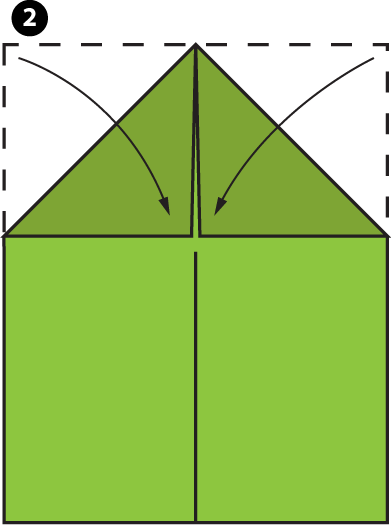
Step 2:
- Now bring the Top Left-hand edge and Top Right-hand edge to the centre crease
- Make sure you don’t cross the centre line
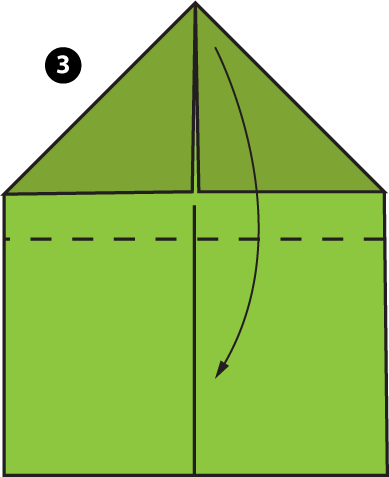
Step 3:
- Bring the Nose down to the straight line – If the height from the bottom of the straight line matches the height of below the triangle (Compare Fig.3 and Fig.4)
- Once it matches fold them
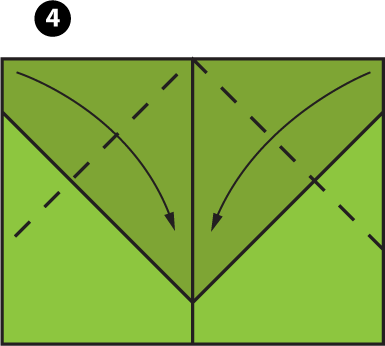
Step 4:
- Bring the Top Right-hand edge and Top Left-hand edge to the centre crease line of about 3/4 of its length and fold it
- Check Fig.5 to understand where they actually meet
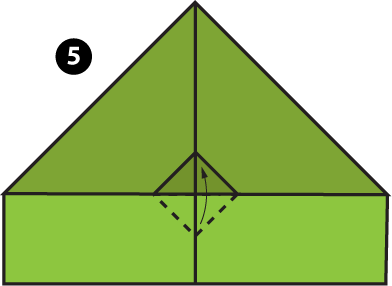
Step 5:
- Pull up the nose and make a lock using this technique as shown in Fig.5
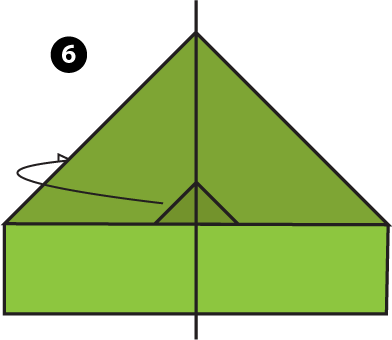
Step 6:
- Mountain fold the Aloft craft paper airplane into Half and check for their symmetry
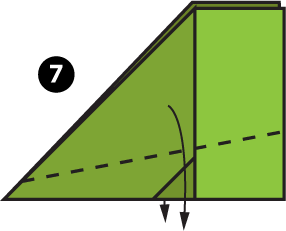
Step 7:
- Its the time for making the wing – Fold of about 1 inch from the bottom of the paper airplane ( But the fold is diagonal i.e. Maximum of the Fuselage could be 1 inch)
- Refer Fig.7 and Notice the Dotted lines – They aren’t straight
- Do the same for the other side too
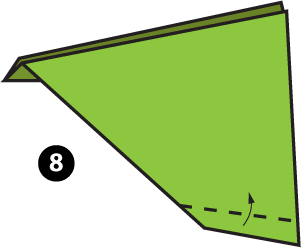
Step 8:
- Winglets are great control surfaces for stabilizing your aircraft
- Fold the wings on both side edges of about half-inch to the upside to make winglets
- Compare Fig.7 and Fig.8 for your doubts and instructions
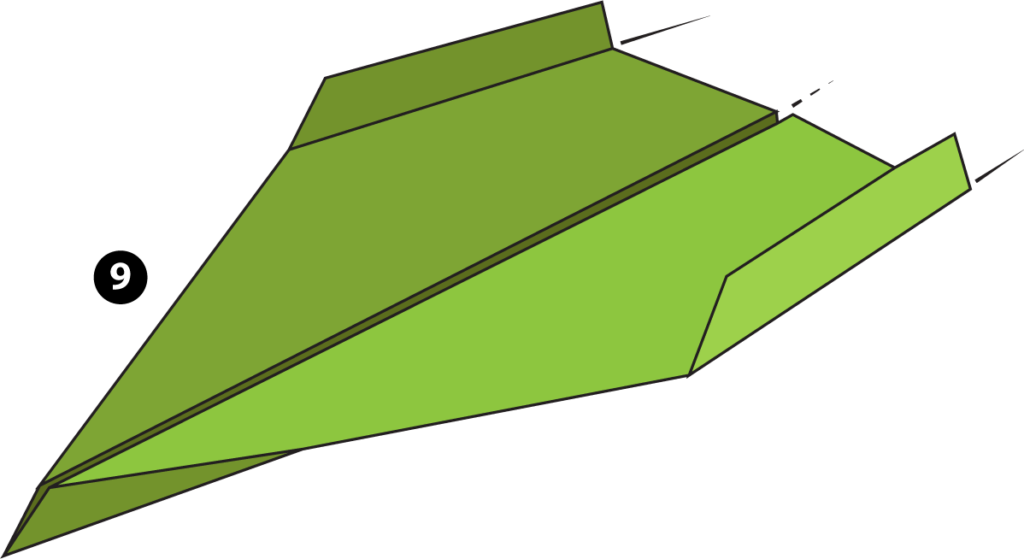
Step 9:
- Your Aloft craft levitator is ready for Flight!
- Take it to the Runway peacefully and Let it explore your grounds!
Aloft flying technique:
- Hold the Plane behind the centre of the plane’s gravity centre
- Keep your left foot slightly forward and launch it in 30 – 40 degrees angle, throw it steadily with a medium force. If it fails, tweak the tail wing slightly up and try again.
- Try different angles and forces now! Wow, That’s how one learns properly with more trying and flying. Kudos!
- For More Techniques – Go to Flight Science > Flying Techniques. You will find far more than any other tricks available on the internet for How to fold a Paper airplane!
Please leave your Feedbacks / Replies / Queries in the comment section. Good day!
© LND 2020. All contents on this page are illustrated and instructed by liftndrift.com. Except for the permitted contents by the copyright law applicable to you, you may not use or communicate any of the content on this website, including files downloadable from this site, without the permission of theliftndrift@gmail.com
