
Origami is a traditional way of making paper airplanes and the name meaning as it goes like (Ori-gami : Folding-papers). This technique has come from the Japanese people as a gift to the whole world, A big thanks to them. Origami paper plane is a certain way of making airplanes in fact it is a method to create a Japanese paper airplane which sometimes is just a paper airplane prototype or an actual flying paper airplane. Origami paper way helps you recreate anything from your imagination. So Origami paper airplane is not so far from making! Before going into the origami excitement, Check out our how to make a boomerang plane tutorial. Let’s know how to make a origami paper airplane that is easy and simple using LND’s illustrated instructions.
Two minutes for Noodles! isn’t it? Three minutes for Paper planes! It’s that simple with liftndrift*
Supplies Required:
- A4 Sheet of Paper or a Foolscap Paper with 70-90 GSM for origami plane
- Ruler or Flat thick object to flatten the folded edges to make a strong crease.
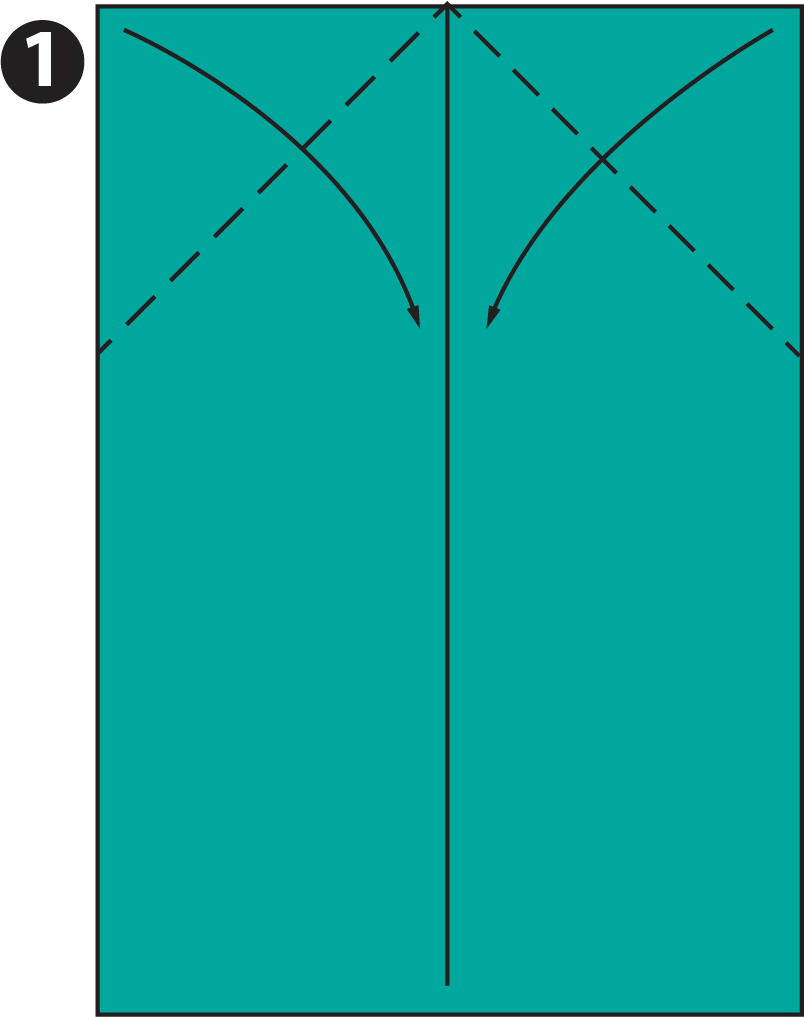
Step 1:
- Keep the A4 sheet of paper in portrait orientation before folding the paper into half
- Fold the paper into half and UNFOLD it back.
- Make a cone by bringing the top right-hand edge and top left-hand edge to the center crease.
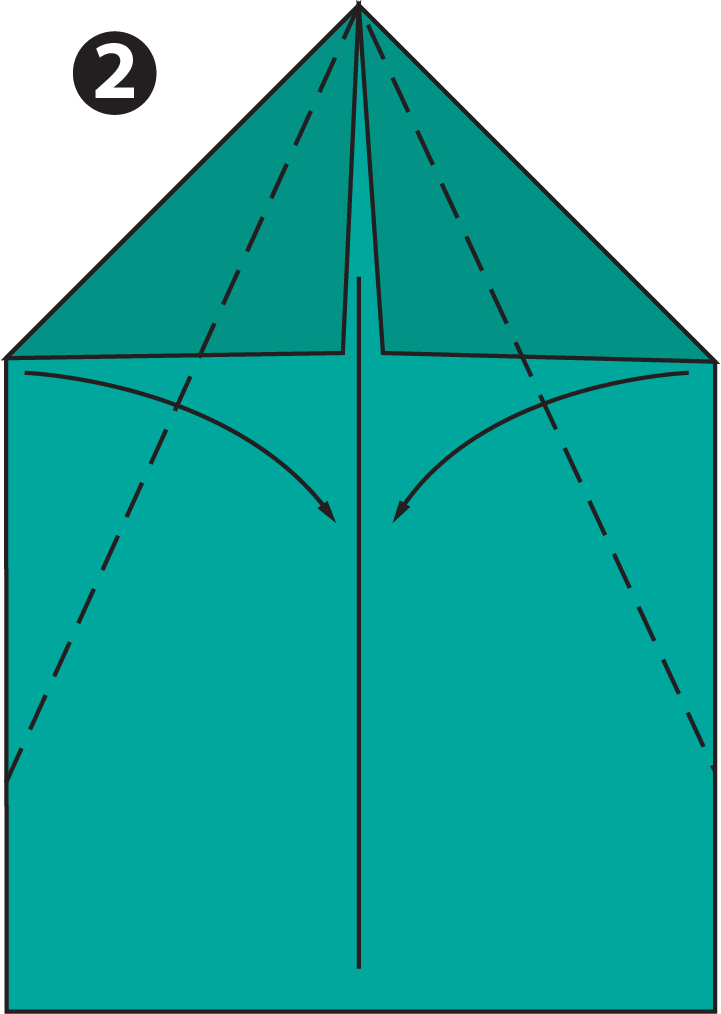
Step 2:
- Now, fold the left & right side diagonal edges to the centre crease as shown in Fig.3
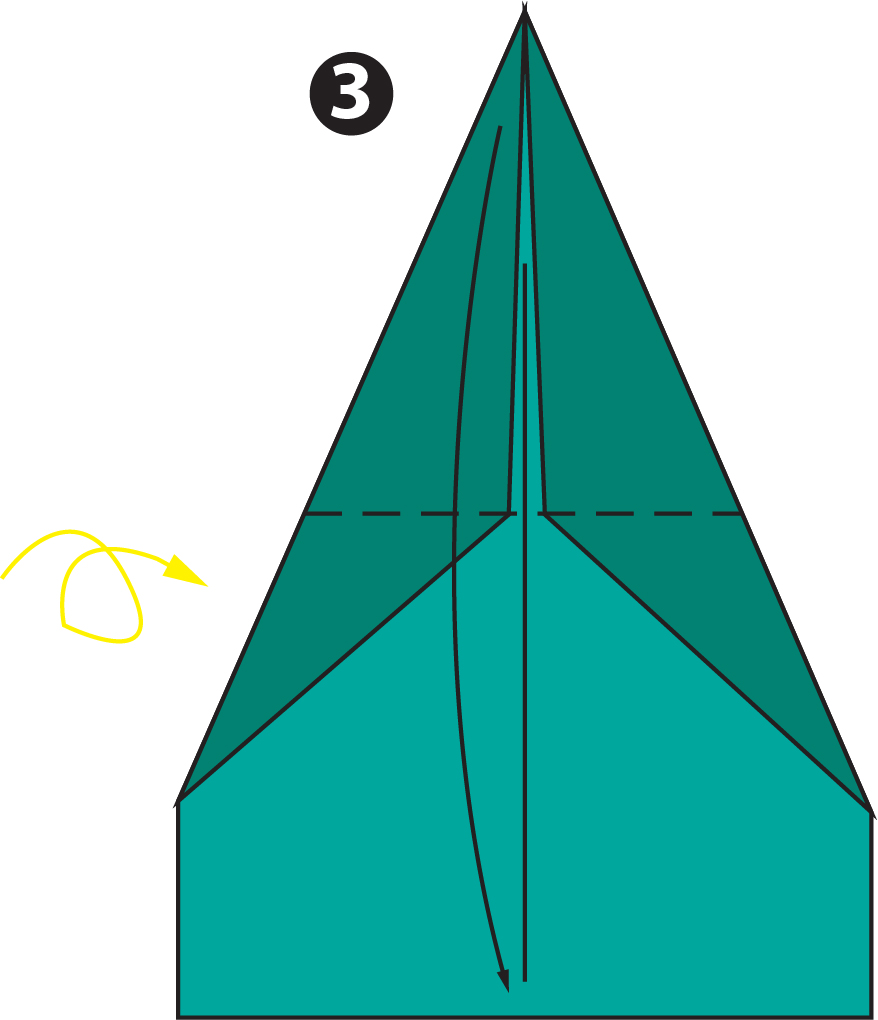
Step 3:
- Fold the nose down and make sure the nose matches the straight line.
- Turn the paper over to the other side
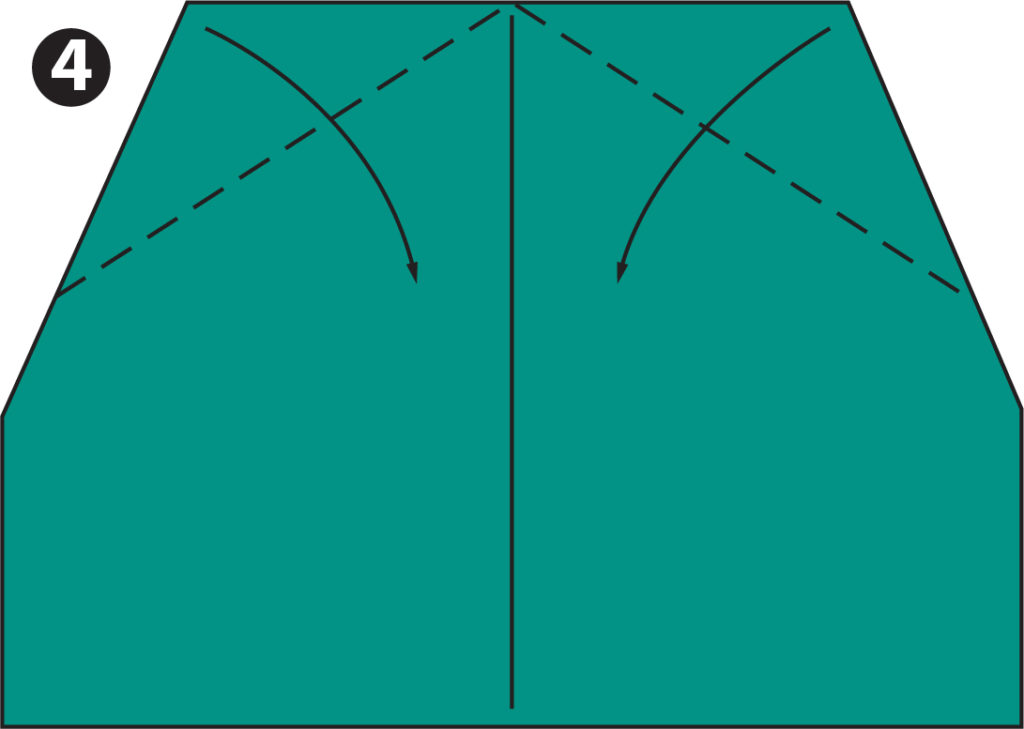
Step 4:
- Fold the paper as indicated in the picture Fig.4
- Once folded make sure the fold’s bottom is parallel
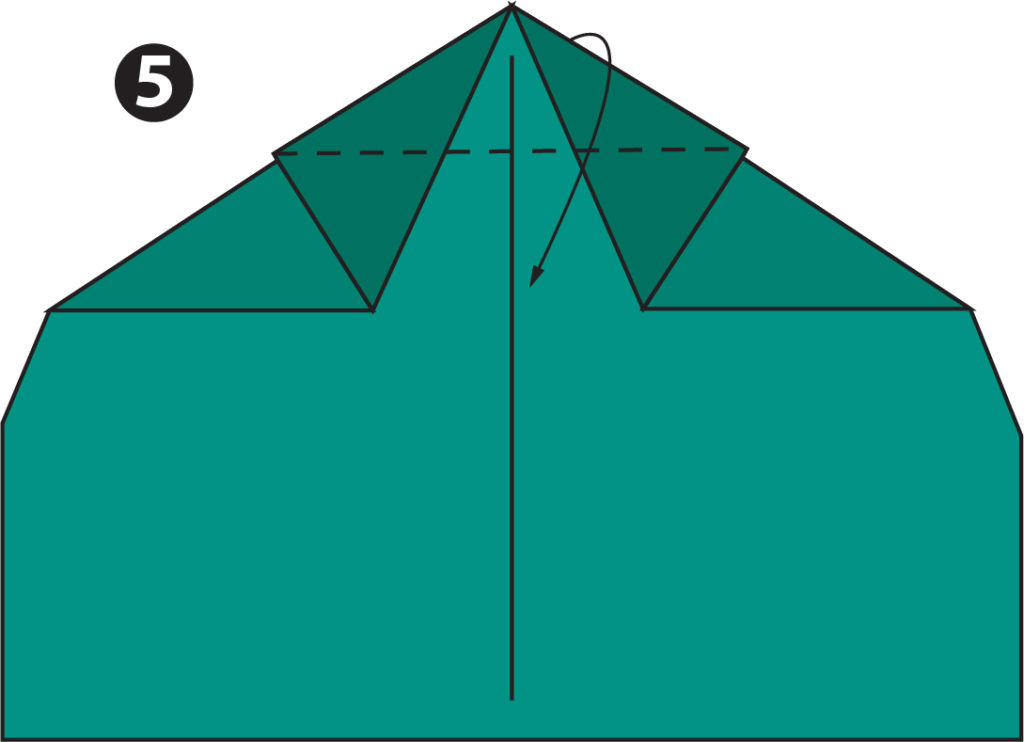
Step 5:
- Mountain fold the nose as shown in Fig.5
- Origami paper plane has sometimes a sharp nose approach on their designs. But what makes it complicated is that the complex level of paper foldings.
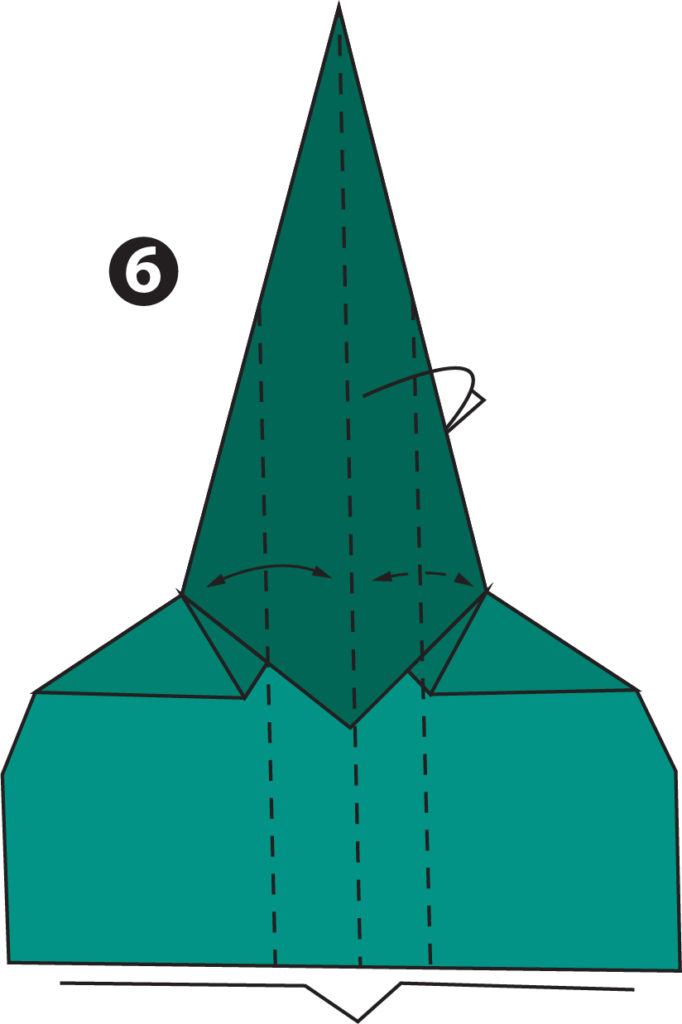
Step 6:
- This step is the final fold, As shown in fig.6 you need to fold the centre line inside (Fold into the half with the mid-dotted line as centre)
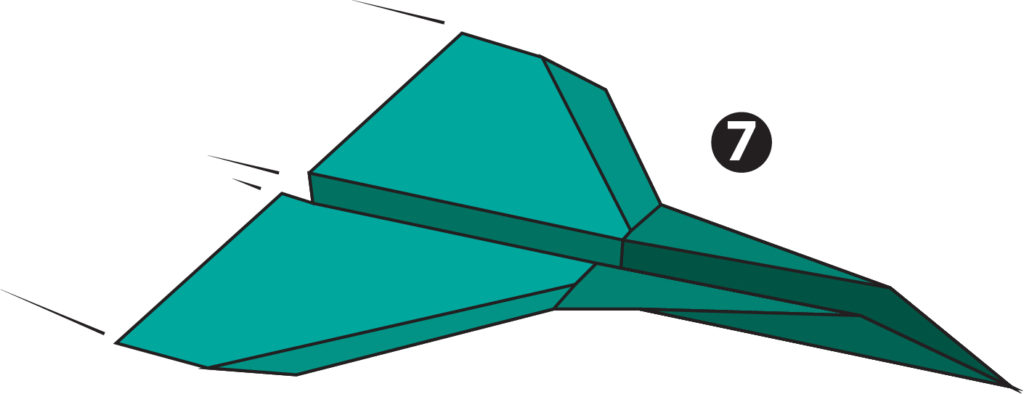
- Then make the wings, (Compare fig.6 & fig.7)
Step 7:
- Lift-up the wings a bit and launch the plane in the mid-section.
- The sky is all yours, throw your origami paper airplane into the air! Just fair!
Origami Paper Plane Flying Technique:
- Hold the Plane behind the centre of the plane’s gravity centre.
- Keep your left foot slightly forward and launch it in 30 – 40 degrees angle, throw it steadily with a medium force. If it fails, tweak the tail wing slightly up and try again.
- Try different angles and forces now! Wow, That’s how one learns properly with more trying and flying. Kudos!
- For More Techniques – Go to Flight Science – Science behind paper airplanes > Flying Techniques. You will find far more than any other tricks available on the internet for How to fly Paper airplanes!
Please leave your Feedbacks / Replies / Queries in the comment section. Good day!
© LND 2020. All contents on this page are illustrated and instructed by liftndrift.com. Except for the permitted contents by the copyright law applicable to you, you may not use or communicate any of the content on this website, including files downloadable from this site, without the permission of theliftndrift@gmail.com
