
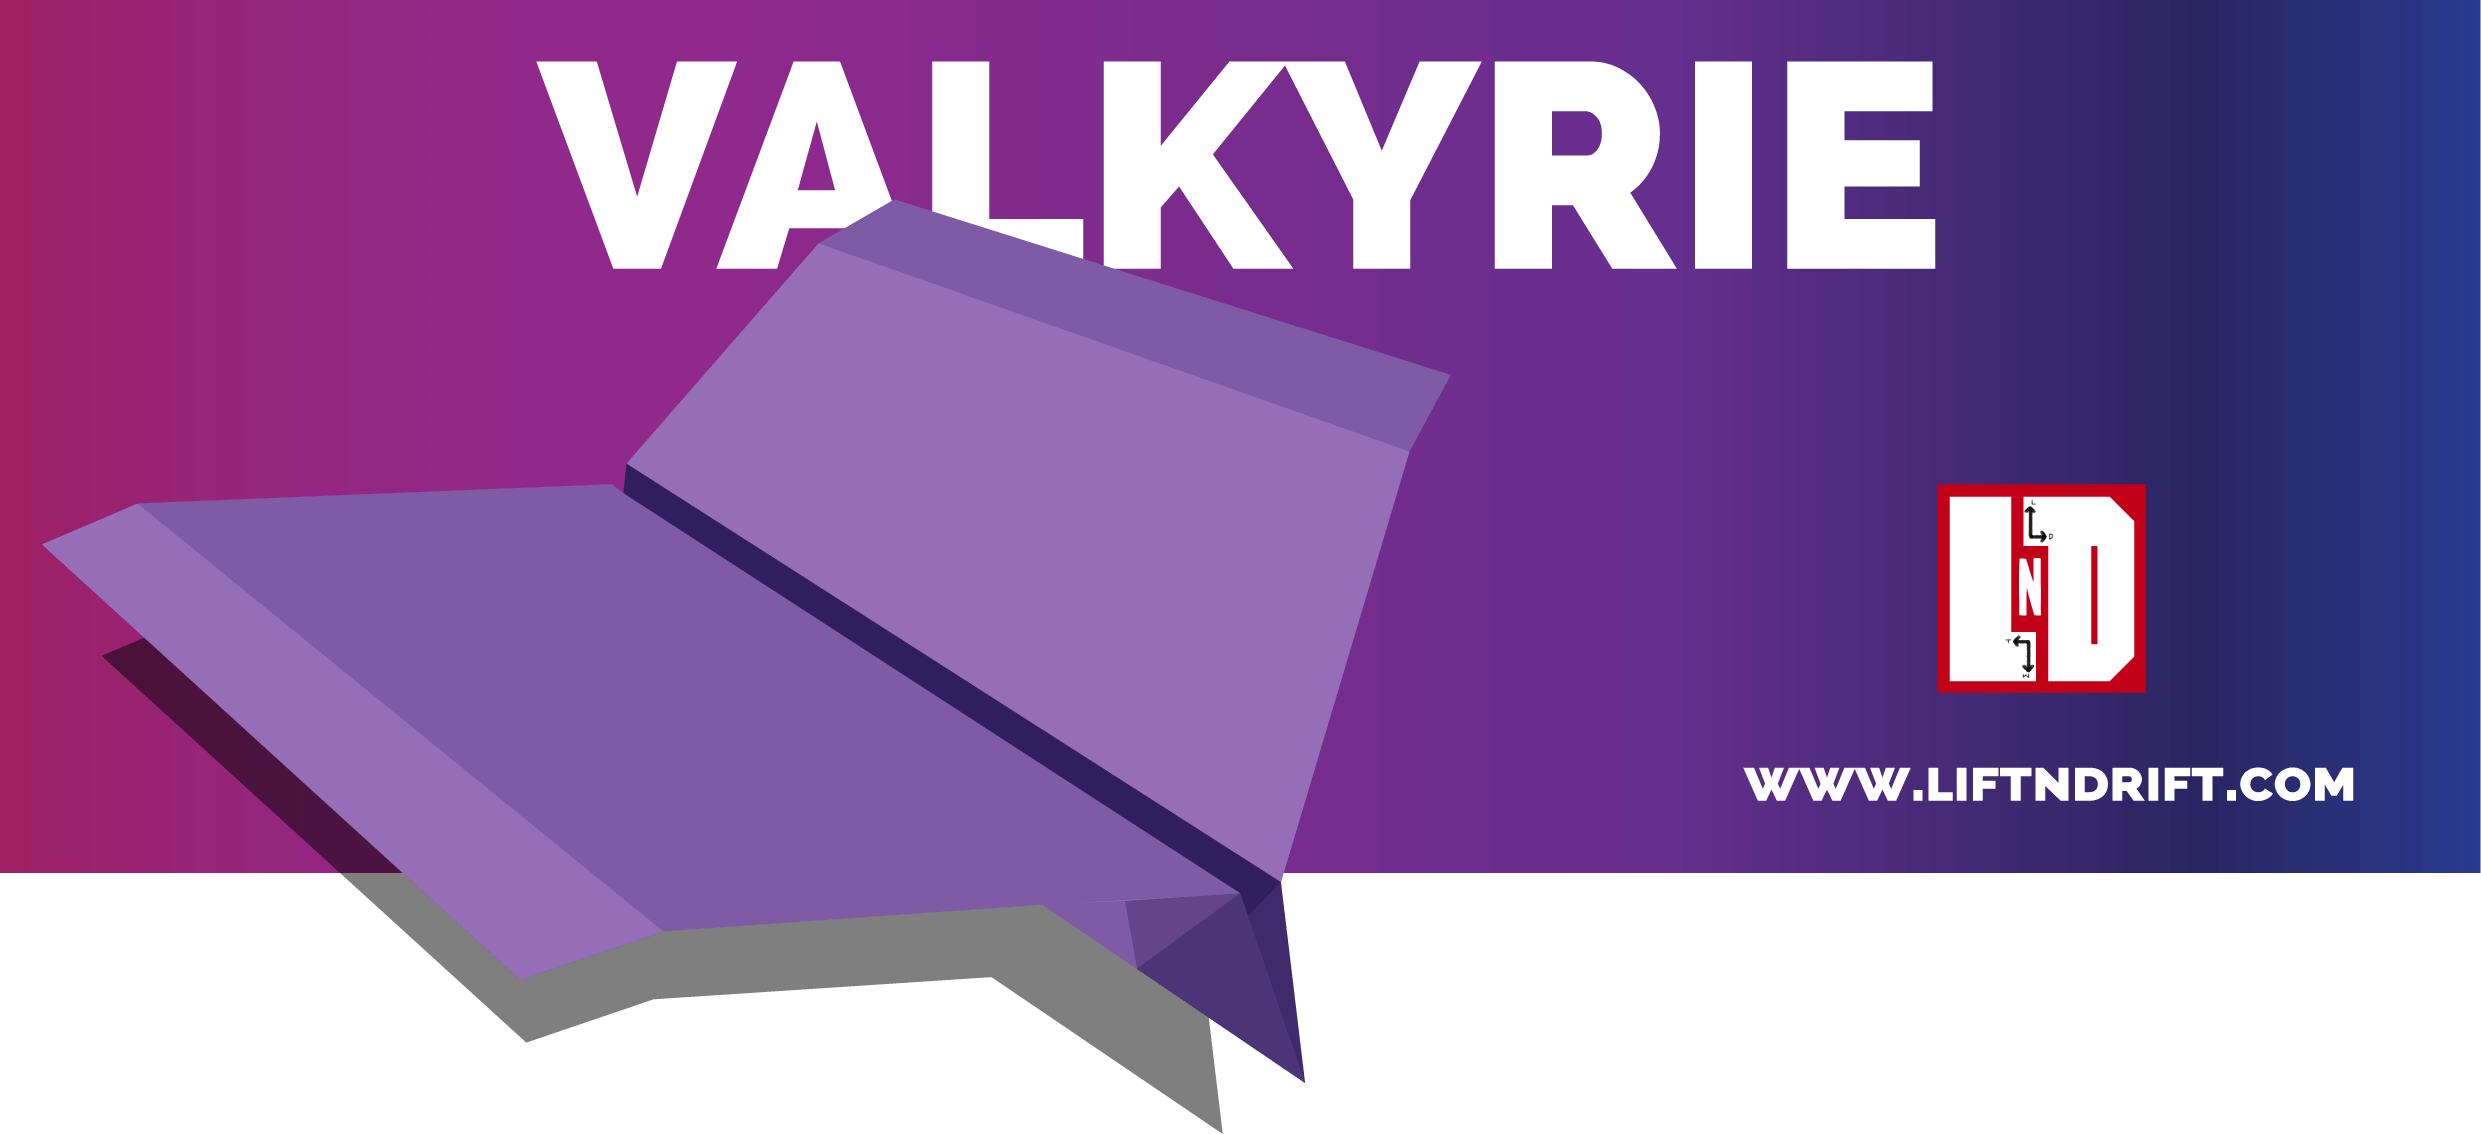
Paper airplane designs not only vary themselves according to their designs they have different styles of launching methods. Delta wing planes need to be thrown quick and hard. Glider designs have varying launching speed from Gentle to Hard techniques. Also, they have varying angle throws. So, Let’s study Valkyrie by throwing into the air, Before that, we have to make one isn’t?
Two minutes for Noodles! isn’t it? Three minutes for Paper planes! It’s that simple with liftndrift*
Supplies Required:
- A4 Sheet of Paper or a Foolscap Paper with 70-90 GSM
- A kid Friendly scissor if you cannot slit the extras by hand with accuracy.
- Ruler or Flat thick object to flatten the folded edges to make a strong crease.
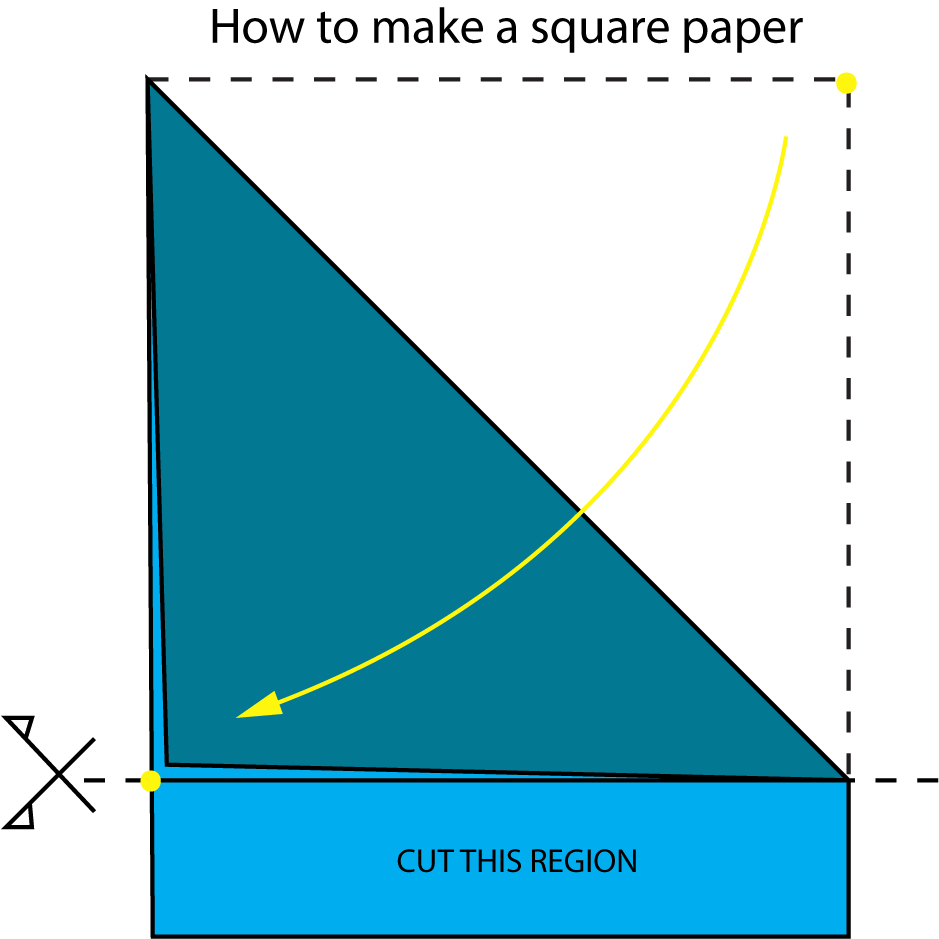
How to Make a Square Paper?
Keep your A4 sheet vertically like a portrait rectangle over the work table or floor. Grab the top right sharp edge to match the left side of the paper straight. Now cut off the bottom remaining piece of the paper by scissor Refer the picture below for your doubts.
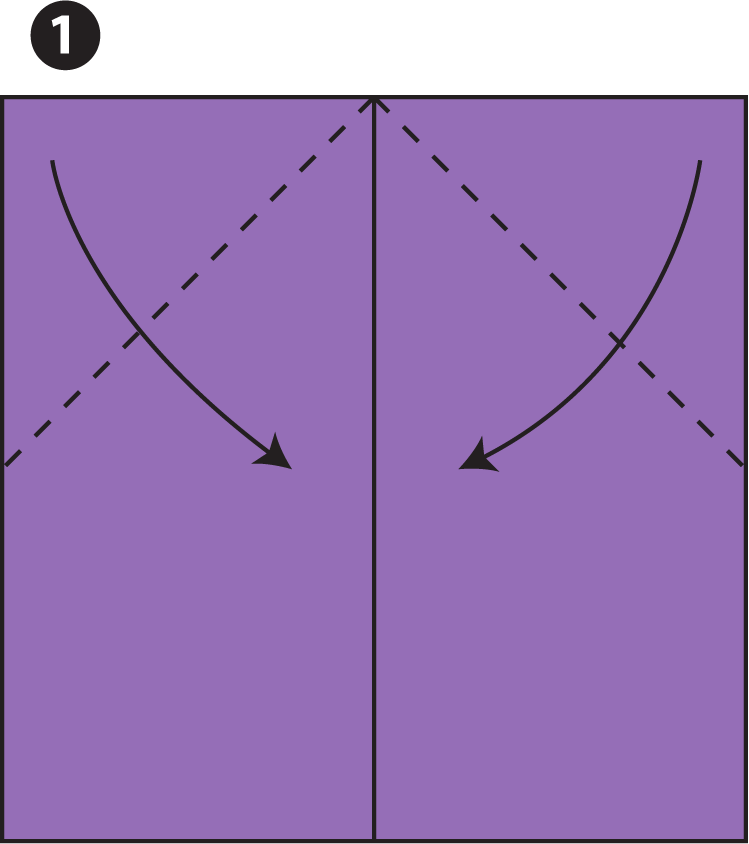
Step 1:
- First of all start by folding the paper into half from right to left & UNFOLD
- Now, Bring the Top Right-hand edge to the centre line and Top Left-Hand edge to the centre line to make a Cone
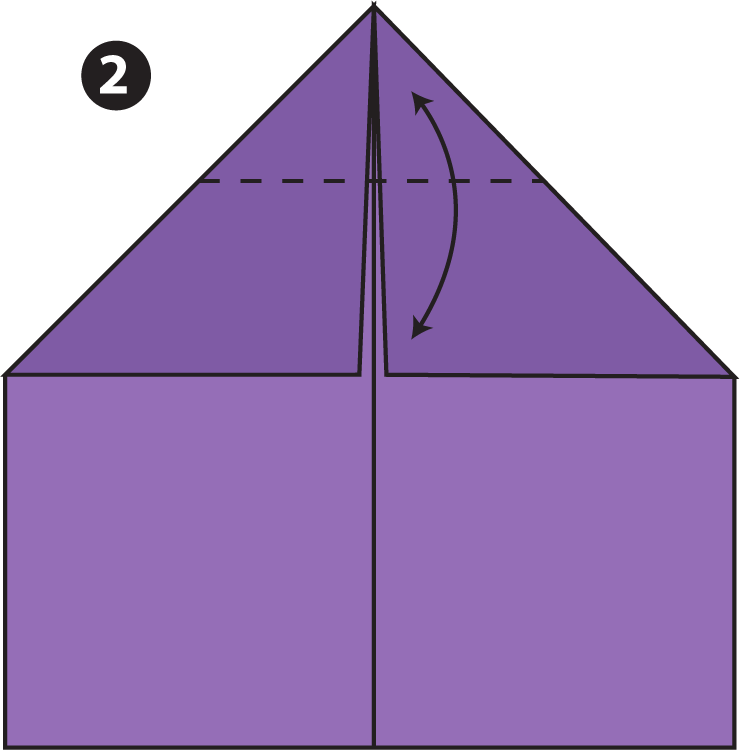
Step 2:
- Now, You have to Fold the Nose down to where your previous fold ends
- Make sure the Top Nose point edge of your valkyrie is matching the Centre line Properly and UNFOLD
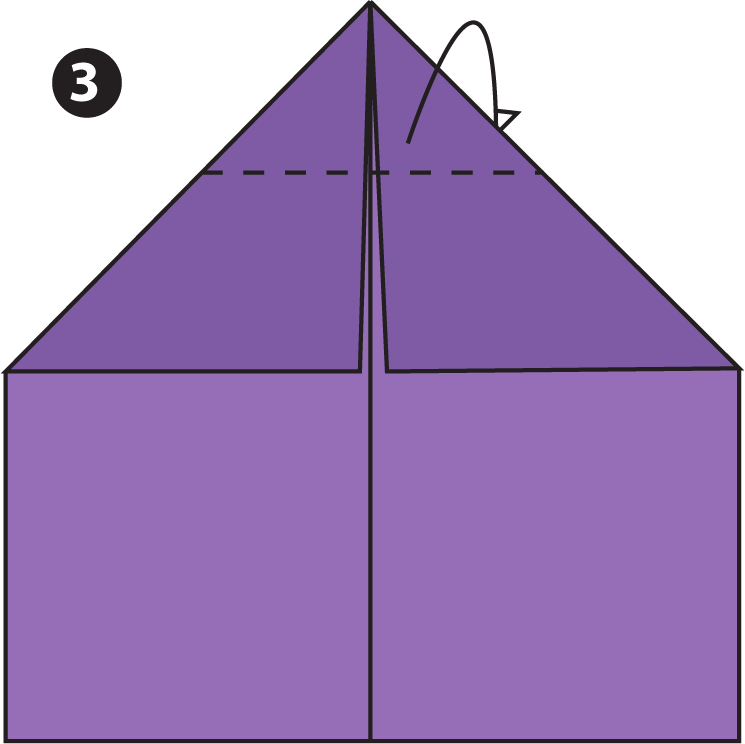
Step 3:
- Mountain fold the Nose to the Backside as shown in Fig.3 using the Previous folded crease
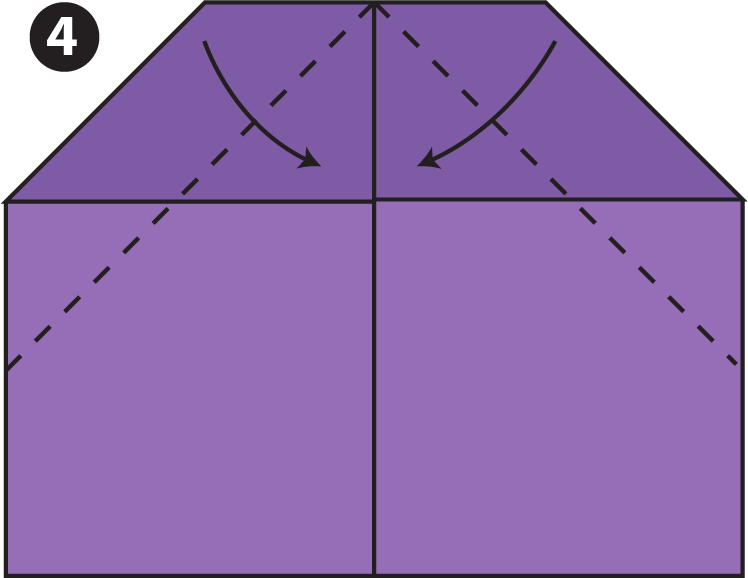
Step 4:
- Now, you have both Top Right and Left side edges bring them to the Centre line
- Make sure they don’t cross the Centre crease and folded properly. I believe in you … 🙂
Paper Airplane facts: “Paper airplanes have flown longer distance than the Wright Brothers first flight of a real airplane“
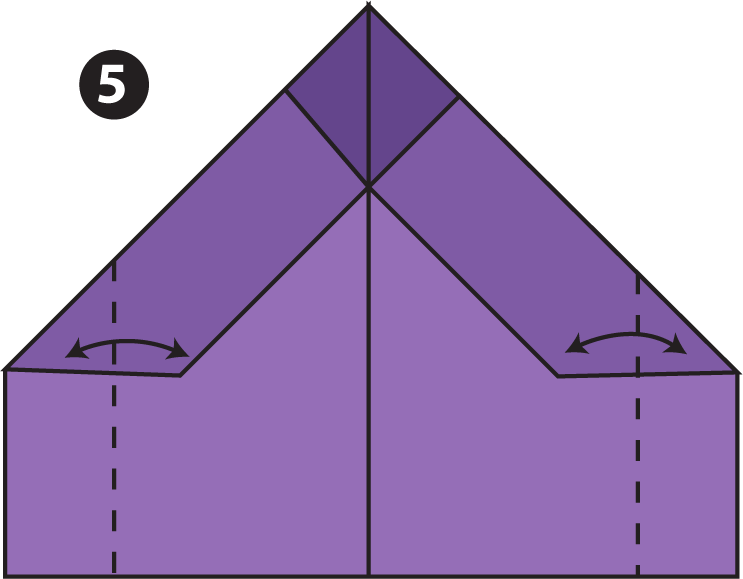
Step 5:
- Now on the wings of both sides fold the Winglets inward and Unfold them
- If you have confusions, Just look at the Fig.5 for making valkyrie
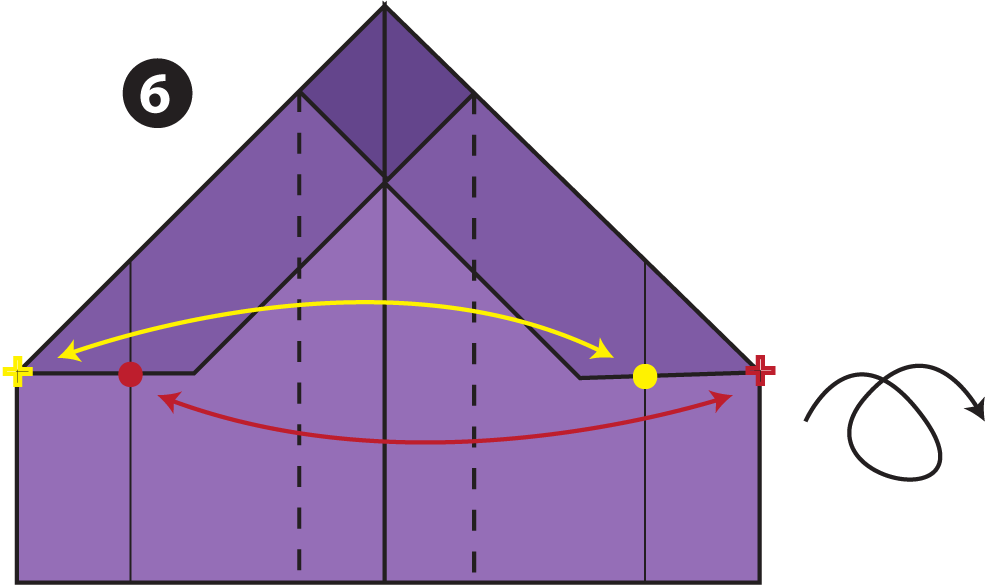
Step 6:
- For Making the Primary wing, You need to first fold the Left-hand Outside corner (Yellow to Yellow dot) in the direction of Yellow arrow. Once done you have to Unfold it.
- Do the same for the Right-hand Outside corner (Red to Red dot) in the direction of Red arrow pointing and Unfold once its done
- Turn over the Paper
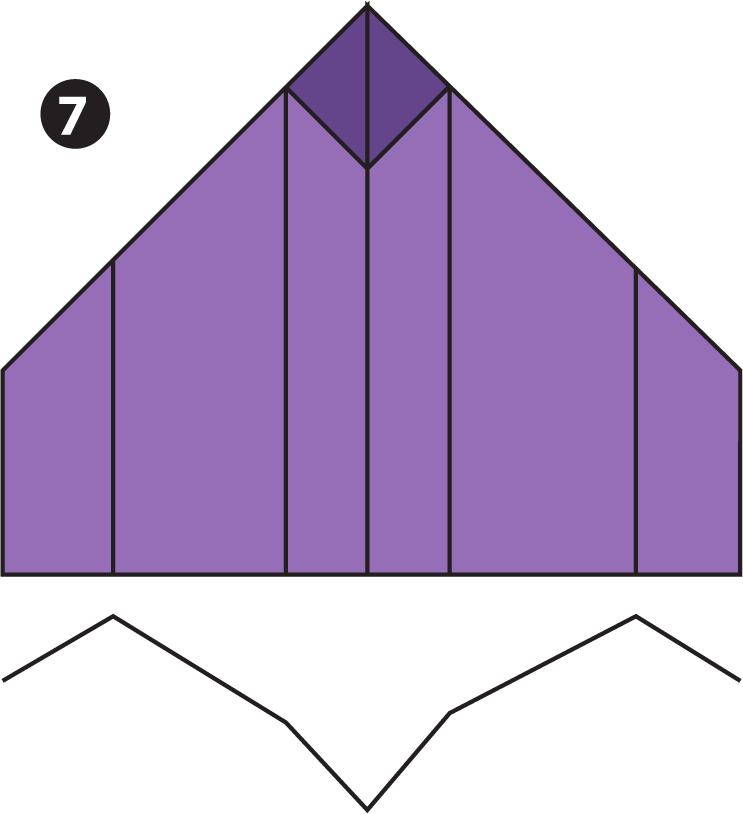
Step 7:
- Understand the crease line in the Fig.7. You have already made those Crease. All you have to do is Just Fold them as like shown below the Fig.7 orientation. This shape is called Dihedral Wing
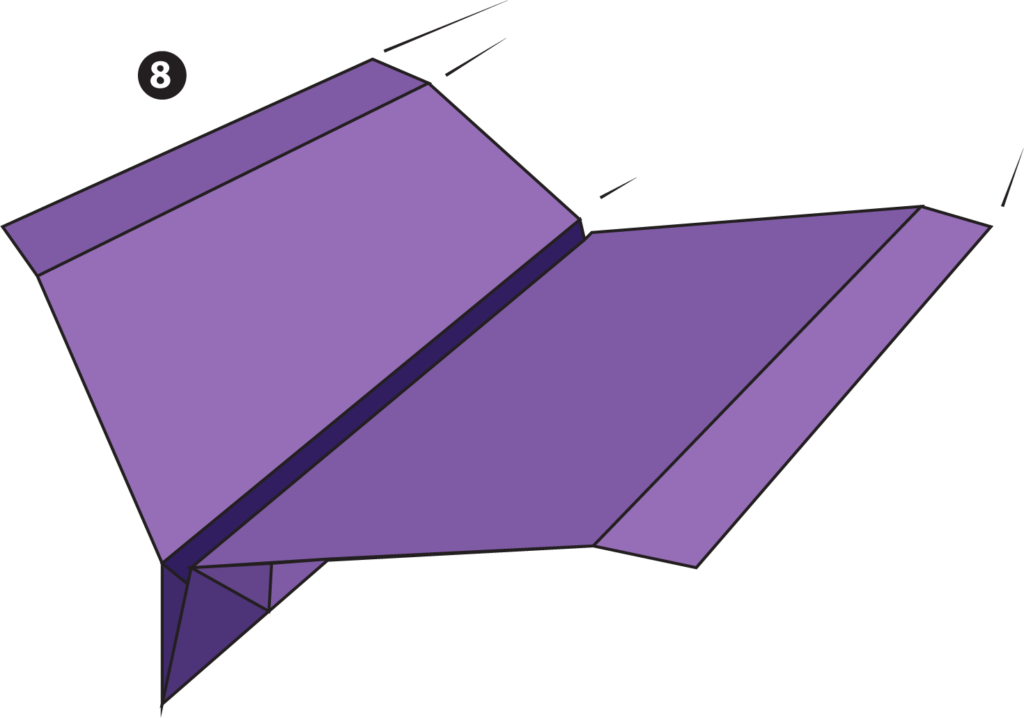
Step 8:
- This plane is suitable for variable speed and Angles. Find out the Longest possible angle and Speed and Comment below this post!
- What are you waiting for? Try this out, Go to the Ground!
Make more and Fly more with paper airplane designs
Valkyrie flying technique:
Keep your left foot slightly forward hold your plane in the thicker part of the fuselage right behind and launch it in 30 – 40 degrees angle, Give it a quick toss. If it fails, tweak the tail wing slightly up and try again.
Try different angles and forces now! Wow, That’s how one learns properly with more trying and flying. Kudos!
For More Techniques & Paper plane Science – Go to Aerodynamics > Flying Techniques. You will find far more than any other tricks available on the internet for How to fly Paper airplanes!
Please leave your Feedbacks / Replies / Queries in the comment section. Good day!
© LND 2020. All contents on this page are illustrated and instructed by liftndrift.com. Except for the permitted contents by the copyright law applicable to you, you may not use or communicate any of the content on this website, including files downloadable from this site, without the permission of theliftndrift@gmail.com
