

The most value-adding thing for a paper airplane could be their streamlined design, The sleek nature of them allows them to escape – slip through the air medium easily without getting affected. That’s the reason for airplanes which are fast and reaching more distances. They basically cut through the air medium which makes them experience lesser drag. The migrant Paper airplane has a fin at the backside which acts as a vertical stabilizer in commercial aircraft. If you think there is an air shark, Migrant is one of them. Scroll down to make migrant using paper airplane instructions
Two minutes for Noodles! isn’t it? Three minutes for Paper planes! It’s that simple with Liftndrift*
Supplies Required:
- A4 Sheet of Paper or a Foolscap Paper with 70-90 GSM
- Ruler or Flat thick object to flatten the folded edges to make a strong crease.
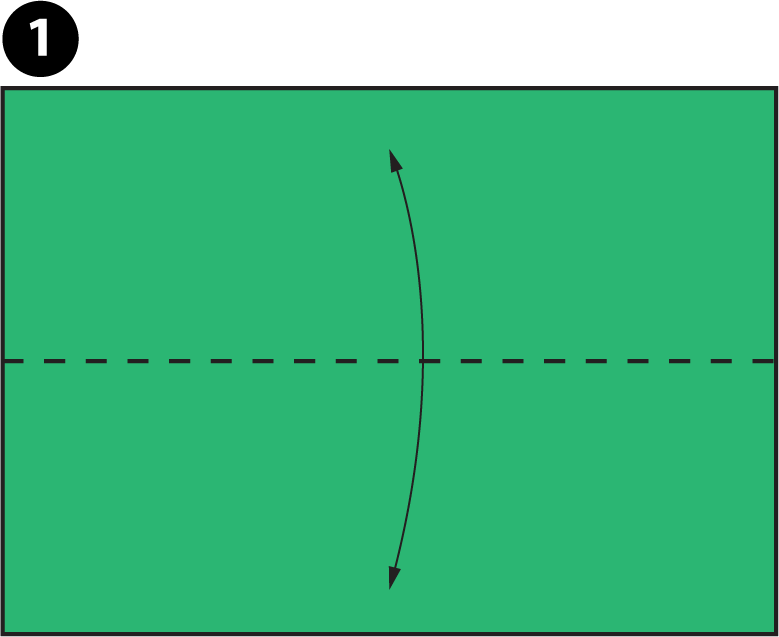
Step 1:
- Keep the A4 sheet of paper in Landscape orientation and fold them from top to bottom equally as shown in Fig.1
- UNFOLD them once done.
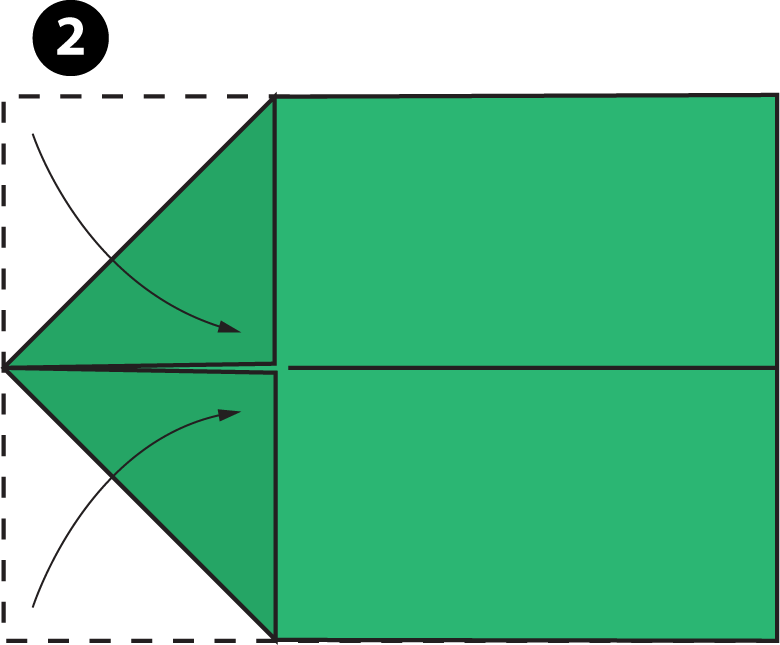
Step 2:
- Now bring the Top Left-hand edge and Bottom Left-hand edge to the centre line
- Make sure you dont cross the centre line
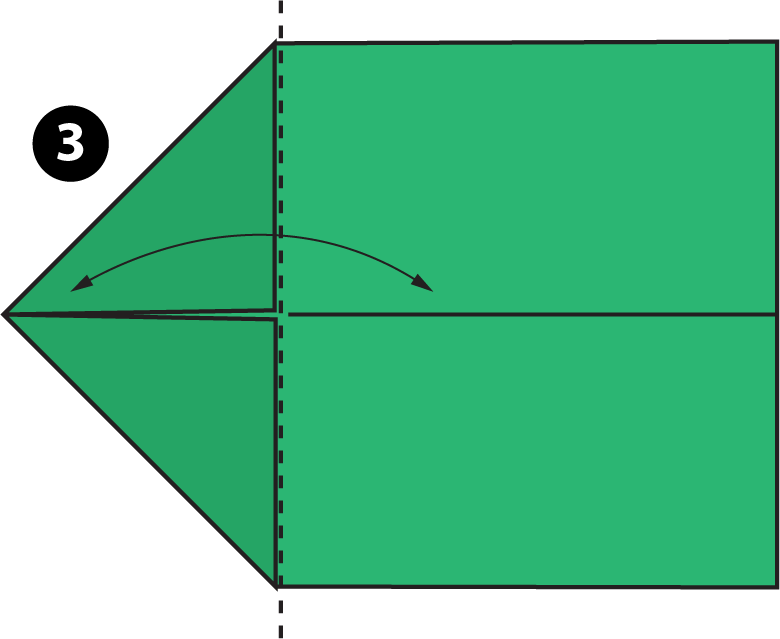
Step 3:
- Now, bring down the complete triangle of the paper airplane designs along the dotted lines and UNFOLD them.
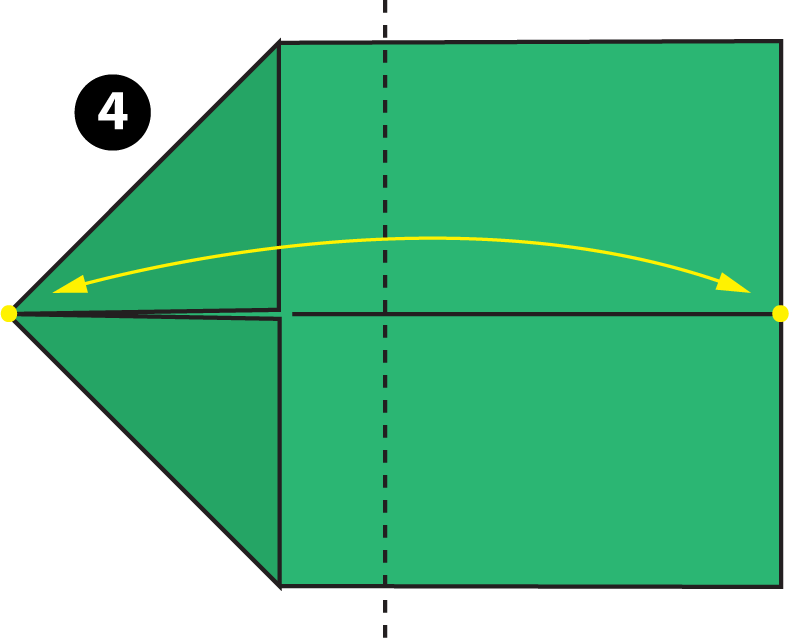
Step 4:
- Match the Nose tip of the paper airplane to the bottom line
- Make sure it is matching the straight line and fold the section
- UNFOLD them afterwards
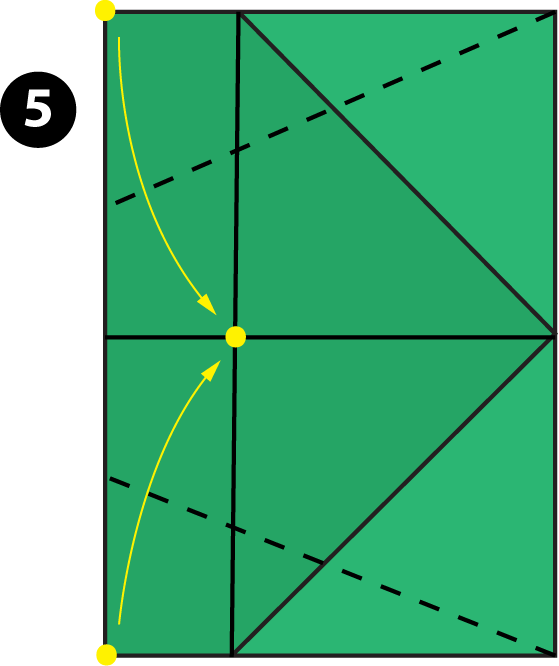
Step 5:
- Now, fold the top left-hand edge and bottom left-hand edge to the triangle’s bottom
- Easy way is Fold the plane from Yellow to Yellow on both sides to the centre
Step 6:
- Then Fold the Top left-hand and Bottom Left-hand edges to the centre crease
- If you have a further doubt compare Fig.6 and Fig.7

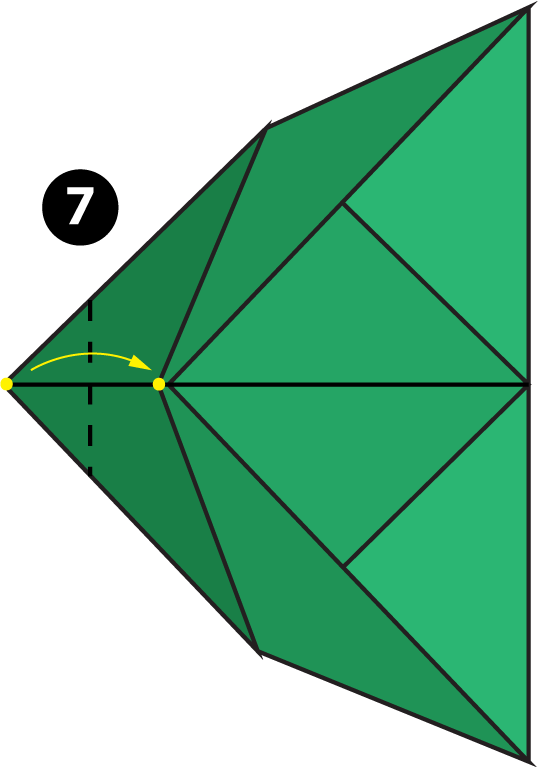
Step 7:
- Now, Fold down the Nose from Yellow dot to Yellow dot as shown in Fig.7
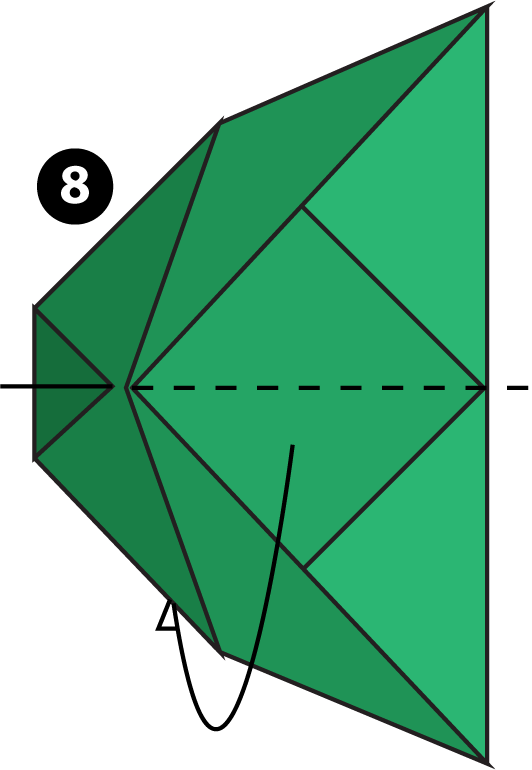
Step 8:
- Mountain Fold the paper airplane into half as the arrows directed but check for their symmetry
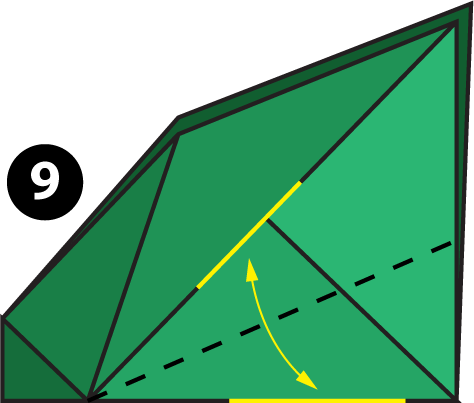
Step 9:
- Look at Fig.9 you can see two yellow lines one is on top fold and another is on the bottom line
- Match the bottom line to the Topline throughout straight and fold them properly and UNFOLD
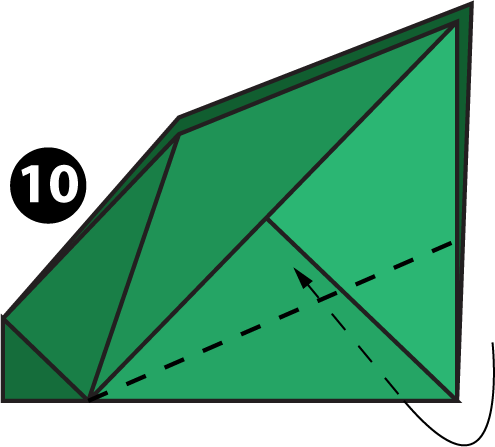
Step 10:
- Now, you have to push the section you folded previously inside the wing
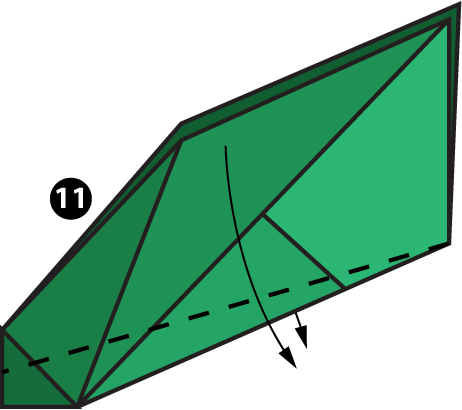
Step 11:
- Now, check Fig.11, The dotted lines is travelling from (Left-hand side nose triangle is divided into half and right-hand side is at the bottom)
- Fold them down to make the wings and do the same for other side of the wing
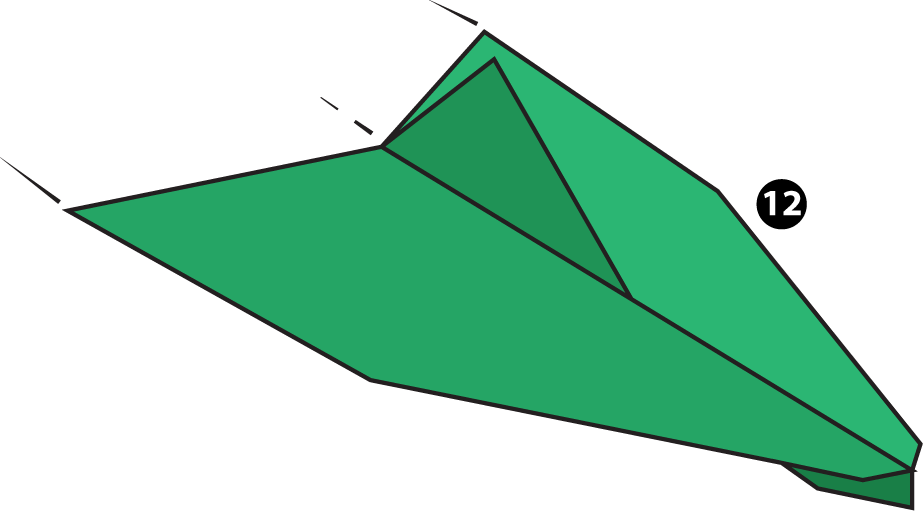
Step 12:
- This is a good plane which can travel straight and can be travel smooth in the air
- All the best for your safe Flight!
Migrant flying technique:
- Hold the Plane behind the centre of the plane’s gravity centre
- Keep your left foot slightly forward and launch it in 30 – 40 degrees angle, throw it steadily with a medium force. If it fails, tweak the tail wing slightly up and try again.
- Try different angles and forces now! Wow, That’s how one learns properly with more trying and flying. Kudos!
- For More Techniques – Go to Flight Science > Flying Techniques. You will find far more than any other tricks available on the internet for How to fly Paper airplanes!
Please leave your Feedbacks / Replies / Queries in the comment section. Good day!
© LND 2020. All contents on this page are illustrated and instructed by liftndrift.com. Except for the permitted contents by the copyright law applicable to you, you may not use or communicate any of the content on this website, including files downloadable from this site, without the permission of theliftndrift@gmail.com
