

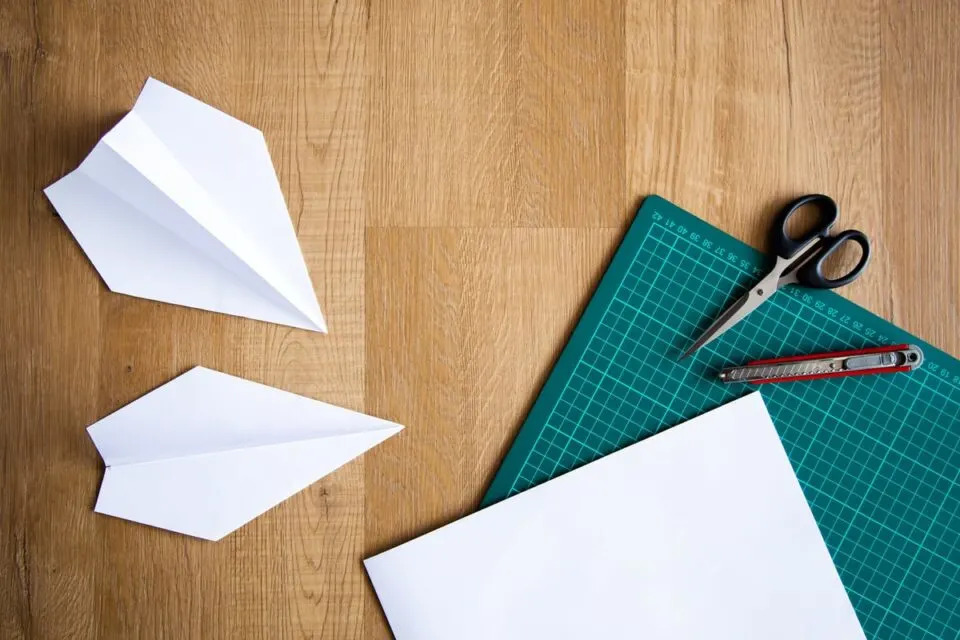
Paper airplanes are a classic childhood pastime that entertains people from all age spectrums. While making a paper airplane is simple, making one that flies well can be a bit more challenging. One way to improve the flight of a paper airplane is to make it more aerodynamic. In this article, we’ll explore tips and tricks for making a paper airplane more aerodynamic and increasing its chances of soaring through the air.
How to choose the right Paper for Paperplane
The category of paper you use can have a significant impact on the flight of your paper airplane. Generally, thinner paper is better for making airplanes because it’s lighter and more flexible, allowing you to make tighter folds and create a more streamlined shape. Look for lightweight and easy-to-fold paper, such as printer paper or origami paper. Choosing the right paper is essential for achieving the best flight performance when making a paper plane. Here are some techniques which I use for selecting the right paper for my paper airplane,
A. Choose Lightweight Paper:
The weight of the paper is an essential factor in determining the flight performance of a paper airplane. The lighter paper will make the airplane easier to fold and fly, while heavier paper will make it harder to fly. Look for thin and lightweight paper, such as printer paper, notebook paper, or origami paper.
B. Avoid Heavyweight Paper:
Paper that is too heavy, such as cardstock or construction paper, will make it harder to create the folds needed for a well-designed paper airplane. The heavy paper also tends to be stiffer and less flexible, limiting the airplane’s ability to fly smoothly.
C. Choose Smooth Paper:
Smooth paper is ideal for making paper airplanes because it creates less drag, which can help the airplane fly farther and faster. Look for paper that is smooth and doesn’t have any rough or textured surfaces.
D. Avoid Textured Paper:
Paper with a textured surface can create additional drag, making it harder for the airplane to fly smoothly. Avoid paper that has a rough texture or a glossy finish.
E. Experiment with Different Paper Types:
While traditional printer paper is a good starting point for making paper airplanes, feel free to experiment with different paper types. Some people have succeeded with tissue paper, tracing paper, or even newspaper.
Choosing the right paper for your paper airplane is an essential step in achieving the best flight performance. Look for lightweight and smooth paper, avoid heavyweight and textured paper, and be bold and experiment with different paper types until you find the perfect one for your design.
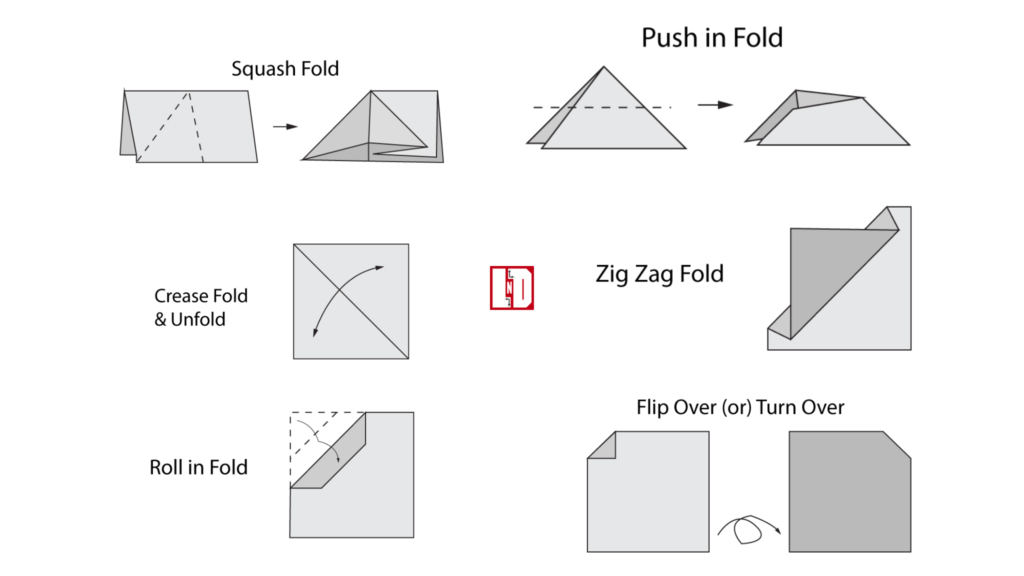
Make Clean Folds
When making a paper airplane, it’s essential to produce clean, sharp folds. This will help to create a smooth surface that reduces drag and increases lift. Use a ruler or straight edge to ensure that your folds are straight and even, and press firmly on the paper to create sharp creases. Folding a paper airplane can be a fun and fulfilling experience, also it can be frustrating if your folds don’t come out clean and sharp. Check out some of the steps you can follow to make clean folds when folding a paper airplane.
Step 1: Choose the right paper
Choosing the right paper is important for creating clean folds. Look for paper that is thin and lightweight, such as printer paper or origami paper. Heavier paper, such as cardstock, can be more difficult to fold and may result in creases that are not as crisp.
Step 2: Use a flat surface
When folding a paper airplane, it’s important to use a flat and even surface. A hard table or desk works best, as it will provide a smooth surface for making your folds.
Step 3: Make precise measurements
Use a ruler or straight edge to make precise measurements and ensure your folds are straight and even. This will help to create a smooth surface that reduces drag and increases lift.
Step 4: Press firmly
To create clean and sharp folds, press firmly on the paper with your fingers or a bone folder. This will help to create a sharp crease that will hold its shape.
Step 5: Check your folds
After making each fold, take a moment to check that it is straight and even. If it’s not, unfold the paper and try again. Taking the time to check each fold will help to ensure that your paper airplane looks and flies its best. With these steps, you can make clean folds when folding a paper airplane. Remember to choose the right paper, use a flat surface, make precise measurements, press firmly, and check your folds. You can create a paper airplane that is both beautiful and aerodynamic if you have some practice and dedication.
Create a Symmetrical Design
An asymmetrical design will help balance the paper airplane’s weight and improve its stability in flight. Make sure that both sides of the airplane are identical and that the wings are placed symmetrically. This will help to reduce drag and improve lift, allowing the airplane to fly farther and more smoothly. Creating a symmetrical design can be a challenging but rewarding experience. Check out some of my tips that can help you achieve symmetry in your designs:
A. Start with a centerline:
The key to creating a symmetrical design is to start with a centerline. Draw a straight line down the middle of your design area, and use it as a guide for creating symmetrical shapes and patterns.
B. Use basic shapes:
Symmetry is all about balance and repetition, so using basic shapes like circles, squares, and triangles can help you create a symmetrical design. Start with simple shapes and build from there.
C. Mirror your shapes:
To create a symmetrical design, you need to mirror your shapes and patterns on either side of the centerline. Draw one half of your design, then fold your paper in half along the centerline to create a mirror image on the other side.
D. Use a ruler:
A ruler can help you create precise lines and measurements, which is important for achieving symmetry in your design. Use a ruler to ensure that your shapes and patterns are aligned and evenly spaced.
E. Be patient:
Creating a symmetrical design takes time and patience. Don’t rush the process, and take breaks when you need to. Step back and look at your design from a distance to ensure that it looks balanced and symmetrical.
F. Edit and refine:
Once you’ve created your symmetrical design, take a step back and evaluate it. Make any necessary edits and refinements to ensure that it looks balanced and symmetrical. Don’t be afraid to make changes if something doesn’t look quite right.
Creating a symmetrical design requires a centerline, basic shapes, mirrored patterns, a ruler, patience, and editing. By following these tips, you can achieve a balanced and beautiful symmetrical design that will impress your friends and colleagues.
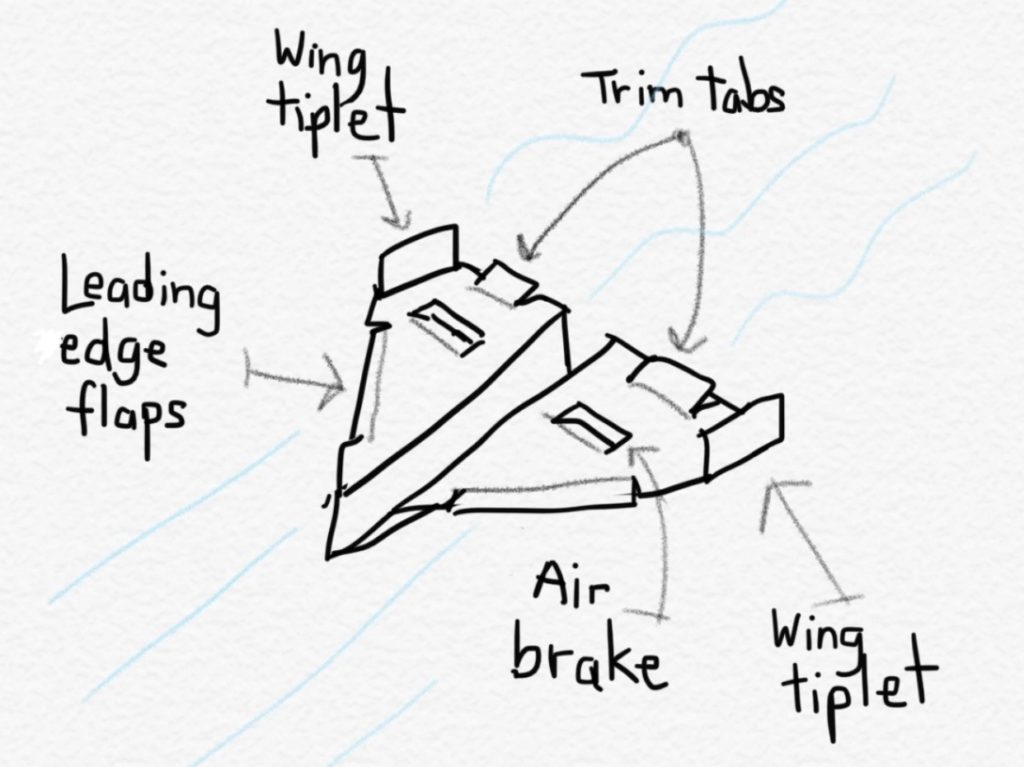
Add Winglets
Winglets are small fins that are attached to the tips of the wings. They help to reduce drag and increase lift, making the airplane more aerodynamic. To add winglets to your paper airplane, fold a small triangle at the tip of each wing and then fold it back in the opposite direction. This will create a small fin that helps stabilize the airplane.
Adjust the Center of Gravity
The center of gravity is the point at which the aeroplane’s weight is evenly distributed. If the center of gravity is too far forward or too far back, the aircraft will be unstable and won’t fly well. To adjust the center of gravity, add a small weight to the front or back of the airplane. This can be a paperclip or a small piece of tape. Test the aircraft after making adjustments to see how it affects its flight.
Following these tips and tricks, you can make a paper airplane that is more aerodynamic and flies better. Remember, practice makes perfect, so feel free to experiment with different designs and techniques until you find the ideal combination for your airplane. But always remember your patience and persistence, you can create a paper airplane that soars through the air gracefully and efficiently.